I come from a long line of sign writers and am happiest with a brush and some paint! Add
paint to fabric and I get really excited!!
Showing posts with label designing. Show all posts

Sunday, August 3, 2014

My Dumptruck Pantograph

A local fabric store was selling these cute little panels and I was asked by two quilters to quilt one for each of them. They were excited when I said I could quilt trucks on them, so with two to do, I invested the time to create a pantograph of dump trucks.

When I create my own pantographs, I use a very basic method. I draw my design element out, outline it in a fine black line with a Sharpie, then I print multiple photocopies of the image. I cut the excess white background away from around the edges of the image and then lay them out on paper I cut from a roll. Once I am happy with the layout, I tape the individual images down and add marker lines to create a continuous line of quilting.

This is a fairly antiquated way to create pantos, considering I could be creating digitized ones on my computer if I had the right software, but I actually enjoy this process. I am able to enlarge or reduce my designs and I can flip them and reverse them. And it allows me time to study how pantos are designed and how to best create a flow for the stitching line to follow. 


As well, I sometimes enlist the use of my opaque projector, or even my overhead projector when I want to enlarge a design and adjust it to the size I find best suits the quilt top I am working on. My opaque projector was one of the first tools I purchased when I started out in the sign business and even this many years later, I still find lots of uses for it.


Both clients provided me with Fireside for the backing and 80/20 cotton batting. 

Wednesday, July 30, 2014

Butterlies on the Yellow Brick Road

This is a client’s Yellow Brick Road quilt she pieced for her granddaughter.
Before quilting photo
She provided me with a cotton batting, pale yellow fireside for the back and requested a butterflies for the quilting pattern. I used a soft yellow toned neutral thread for top and bobbin.

My sister is a sewer, but essentially a non-quilter. At her request, I try to remember to include the before photo of a project in my posts, because as she says, she and many others cannot envision how stitching will alter the look of a pieced top as it transitions to a finished quilt. I like that even simple designs can accomplish this transition. So many times I think how great it would be to cover that top with intricate stitching designs, but the reality is, not every quilt needs this, nor does it contribute to the purpose of the quilt, and as well, not everyone wants to spend the extra money it would cost to pay for the additional time it would take.
After quilting photo


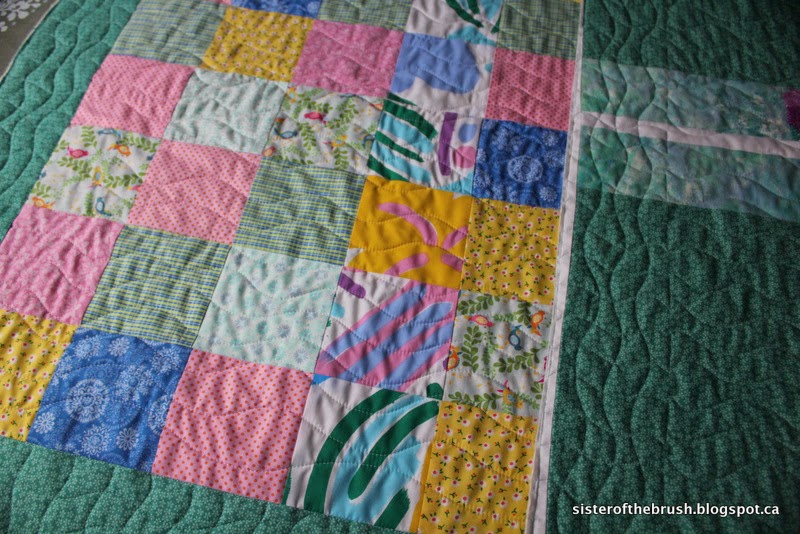
In this case a pantograph design worked really well for the purpose this quilt was meant and it is very pretty with its airy butterflies on the summery, fresh fabrics. It is currently being well used and loved by Sharon’s granddaughter.


I am linking with Monika and other Canadian stitchers at The Needle and Thread Network.

Tuesday, July 15, 2014

Sun Printing Fabrics

That little side trip to Vermont whetted my appetite for fabric painting, so I squeezed a day of play into my busy retirement schedule. As is my habit, I gathered my supplies and tools needed to work on some prototypes for a larger piece I have in progress. And then I proceeded to set up for sun printing. I do that all the time..decide I am working in one technique and then change midstream and start another. This probably drives others (read: husband and offspring) a bit crazy, but it seems to work for me. I am running one process through my head, all the while getting another process set up.

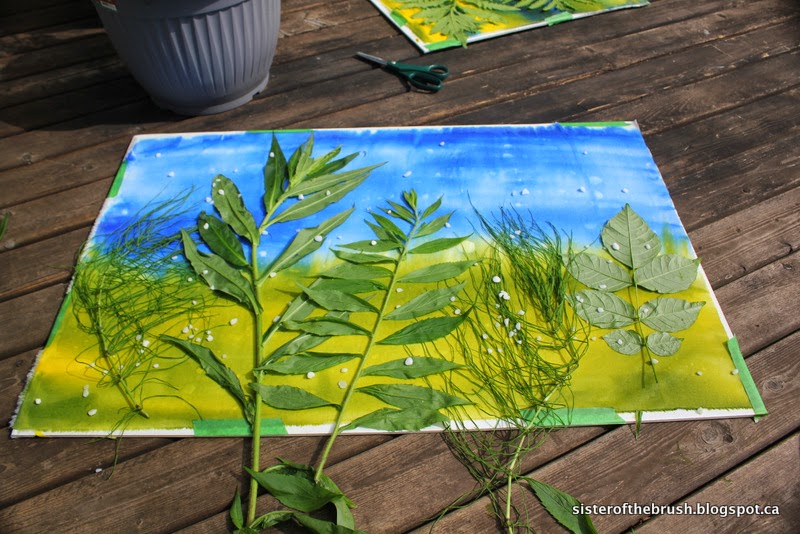
Well, it turns out I picked an A-1 day for sun printing! The tools are basic and the process is easy and fast. I used PFD (prepared for dyeing) fabric, a couple of Setacolor Soleil Paints I had, some wide bristle and sponge brushes, a spray bottle, a piece of foamcore covered and sealed with plastic wrap, some painters tape and a handful of coarse salt.
Then all I needed were objects and materials to print. I collected some leaves, grasses, weeds, some plastic doilies that had been my Grandmother Robertson’s, some buttons, coins and chain.


After cutting my fabric to the size that would fit on the foamcore, I ironed it and taped it in a few strategic spots onto the board so that brushing paint on it  wouldn’t be tedious.


I sprayed my fabric to the extremely technical point of “very wet” and then started brushing paint on. If you don’t have Setacolor Soleil Paints, you can use Setacolor Transparent Paints watered down in a 1:1 ratio. 

If it is really sunny and hot, you need to do these steps fairly fast because your paint will dry quickly. This did happen to me several times and I just gave my fabric a spray of water and I got another effect doing so.


Once you have your paint on, then you pick your items to print, lay them on top of the painted fabric and press them into the fabric. This is also when you can toss the coarse salt over the fabric for added effect.


Then you wait for the paint to dry, which on a beautiful sunny day, doesn’t take any time at all.


Once your painted fabric is dry, remove the objects and materials you used to print, remove the tape and then using a hot dry iron, press your fabric. It’s now heat set, pressed and ready for use! Fun, fun!


Today at Blossom Bake and Create blogger Lynda has a great post with links to even more information about preserving botanicals for use in printing. It is an excellent post and I am anxious more now than ever to get collecting some grasses and leaves to preserve for future surface design sessions.

I am linking to The Needle and Thread Network.

Wednesday, July 2, 2014

A Client Quilt of a Musical Theme

This quilt was such an absolute pleasure to work on.
The piecer, Elaine, is a very skilled seamstress and she did an wonderful job creating this beautiful top as a gift for her grandson on his graduation from high school. Music plays a prominent part in her grandson's life now and will continue to do so, and thanks to his grandmother, he will have this lovely themed quilt to keep him cosy as he begins university this fall.


Elaine told me she liked my swirls and leaves, so swirls and leaves it was! As I free styled over the musical instruments on her carefully pieced blocks, as well as on the pre-printed panels, I tried to create movement and what I imagined to be beautiful music flowing from the horns, pianos and stringed instruments.


I quilted this with a variegated Rainbow thread on the top and a honey gold Glide in the bobbin. I didn’t get a close up of her backing fabric, but it was music bar-lines with notes and treble clefs.


Friday, May 23, 2014

All keyed up! A client quilt

Lately I have been robbing Peter to pay Paul, so to speak. Life has been a delicate balancing act and sometimes sleep just doesn’t come easy with all the file folders in my head filled to capacity and spilling out into my REM time. This morning I was awake far too early and after struggling to stay comfortable and not disturb my husband, I gave in and got up. Did I want to be up and moving before 4 am? No, not really, but sleep was evasive and I knew it was futile to fight. So, with visions of our fridge full of fruits and veggies, I began chopping and sauteing and blending. 

Soon I had a lovely pot of leek soup simmering. 

There was a pasta salad that got pulled together as well, along with my favorite way to start the day, smoothies. There is no set recipe for blender drinks in our house, but today I had a juicy grapefruit that was perfect for the mix and added some zip to our yummy concoctions.

What had been occupying some of my thoughts? Earlier I had received this top from Marie:


Her quilt was the result of a challenge she participated in at one of her guilds. A fellow member brought in a selection of Fons and Porter magazines and challenged the members to complete a project found within the pages. Marie chose to make this wonderful little cuddle quilt for a niece who just happens to be a composer.
The perfect backing!

Marie brought me a 35% higher loft poly batting and using a neutral thread on the bottom and a black thread on top, I quilted a variety of designs to suit the quilt.
I created piano keys in the borders, quilted some stippling in the piano and background, did some straight stitching in the borders and on the red music notes and tried to create a simple design on the keyboard that would reflect a classic style.
I also stitched around the pre-printed keyboard with a monofilament thread to hi-light the individual keys.

There was a bit of discussion about the binding that Marie would add. As with many projects, we sometimes run out of the exact piece we might use because we have bought our fabric with no particular project in mind. Although her first instinct was to sew on a red binding, I think she may go with a solid black.


Tuesday, May 6, 2014

Baby Quilts

These are two baby quilts I recently completed quilting for a customer.


They are so pretty and fresh and soft..I quilted sheep on one and ducks on the other.

The backs are beautiful, soft flannel and I think they will be well received by a couple of very lucky babies!


I am linking with The Needle and Thread Network.                                                                                                                 

Sunday, March 30, 2014

Mad About Teal - A Customer Quilt

This is another quilt I recently completed for a local quilter. This quilter is fairly new to the quilting scene and I know she will be creating more wonderful pieces as she continues. I was very impressed when she showed me her pieced back! I love when newbies step right into the quilting mayhem and ignore the quilting sheriffs out there..When I started quilting, I made my own rules and that same way of thinking has brought me much quilting joy over the years. I wish the same for her...

This is a small quilt called, “Mad About Teal” and I used her idea of swirling lines for the centre and continued with the same, adding perpendicular lines in the borders. It turned this lovely little quilt top into a cosy, comfy lap quilt for a very lucky girl!

Saturday, March 1, 2014

Day Two with Karen Sievert and Myrna Ficken

About twenty minutes into my class Tuesday morning I had my first ”AHA!” moment! We were taking the class "Feathers and Flourishes" with the amazingly talented, funny, funny Karen Sievert. Karen had just explained a method for quilting feathers and we were working on Gammill Visions. I stood at my machine, took a breath and quilted........feathers!! I think I shouted. And Karen, in her gloriously positive way, got just as excited as I did! lol Well, I took off after that and the piece I worked on in Karen’s class is one of my favorites, because of the comfort level I found so quickly. 
The morning flew by! It was a great feeling, a wonderful release to find the flow of stitching within and just quilt! Karen was an energetic presence racing from one student to another, exclaiming over work, passing out hugs and telling us hilarious stories that had us holding our stomachs. 
Tuesday afternoon saw us quilting on Innova longarms when we took “Feathers, Fun and Formal”, with Myrna Ficken, an APQS educator and dealer. Myrna has a fresh style with lots of angular designs and I have been a fan of her stitching for a while. She is a passionate teacher, wonderfully talented and I really enjoyed taking a class with her. Like Karen, she felt like an old friend that it was great to catch up with. 

Building on my stitching from the classes previous, I had a super productive afternoon as Myrna taught us how to create a variety of styles of feathers and also how to fold and curve feathers into boxes and corners and even pile them on top of one another! 

I think the greatest thing about taking back to back classes with different instructors was that I pulled things from each class and then built on them as I progressed through the week. Some designs I played with in Gina’s class got added to and refined in Karen’s. Then I played with them in Myrna’s class a bit more. By the time Friday rolled around, I had a swash of new designs I knew I would be integrating into my repertoire. The other interesting result of this week of classes and working on a variety of machines was that I am 100% sure I purchased the right machine for me when I bought my APQS Millennium

I think Lorette was thinking me a bit (well, probably a whole lot) crazy because at night I would lay my new samples on top of my bed at the hotel as a bedspread and sleep under them. By the time Friday came, I had almost a whole quilt..